Words Lester Perry
Images Jakob Lester
RRP Spider Handlebar Cradle – $129 | Spider Rear Rack – $239
Distributor Southern Approach
Spider Handlebar Cradle
The Spider Cradle is constructed from sturdy glass-reinforced nylon. The whole unit weighs in at 464g and can carry up to an additional 5kg; like a tent, dry bag or similar shaped item. Compatible with almost any bike, the Spider Cradle was simple to fit to my handlebars, particularly after having gone through the process on another bike. The first time could have been smoother, but after properly reading the instructions (who would have thought!), I got everything dialled in and we were good to go!
Ensuring they didn’t foul with any brake or gear cables, I fed the two straps around the handlebar, hooked them onto the strap adjusters, and tightened up the two 5mm bolts—a quick and stress-free process once you know what to do, and as ‘they’ say: the third time is a charm. With ample adjustment on offer, regardless of the diameter or shape of your handlebars, the cradle should be compatible, even if the handlebar or fork is not entirely round. The ease of installation and removal makes switching between bikes or removing after a mission a cinch.
Access to the bolt heads on the strap adjusters is limited, so I’d recommend a ball-end, L-shaped 5mm Allen key to speed up the process. Although a multi-tool does the trick, it isn’t ideal. If you run a stem with a particularly wide faceplate, it’s worth a quick measure-up to check that the cradle will sit comfortably over it.
Having used the Spider Cradle on my mountain bike previously, and rating the setup, I was keen to see how it suited a drop-bar gravel bike, so I mounted it up aboard a loaner bike for our trip to Aotea Great Barrier Island (read about it elsewhere in this issue).
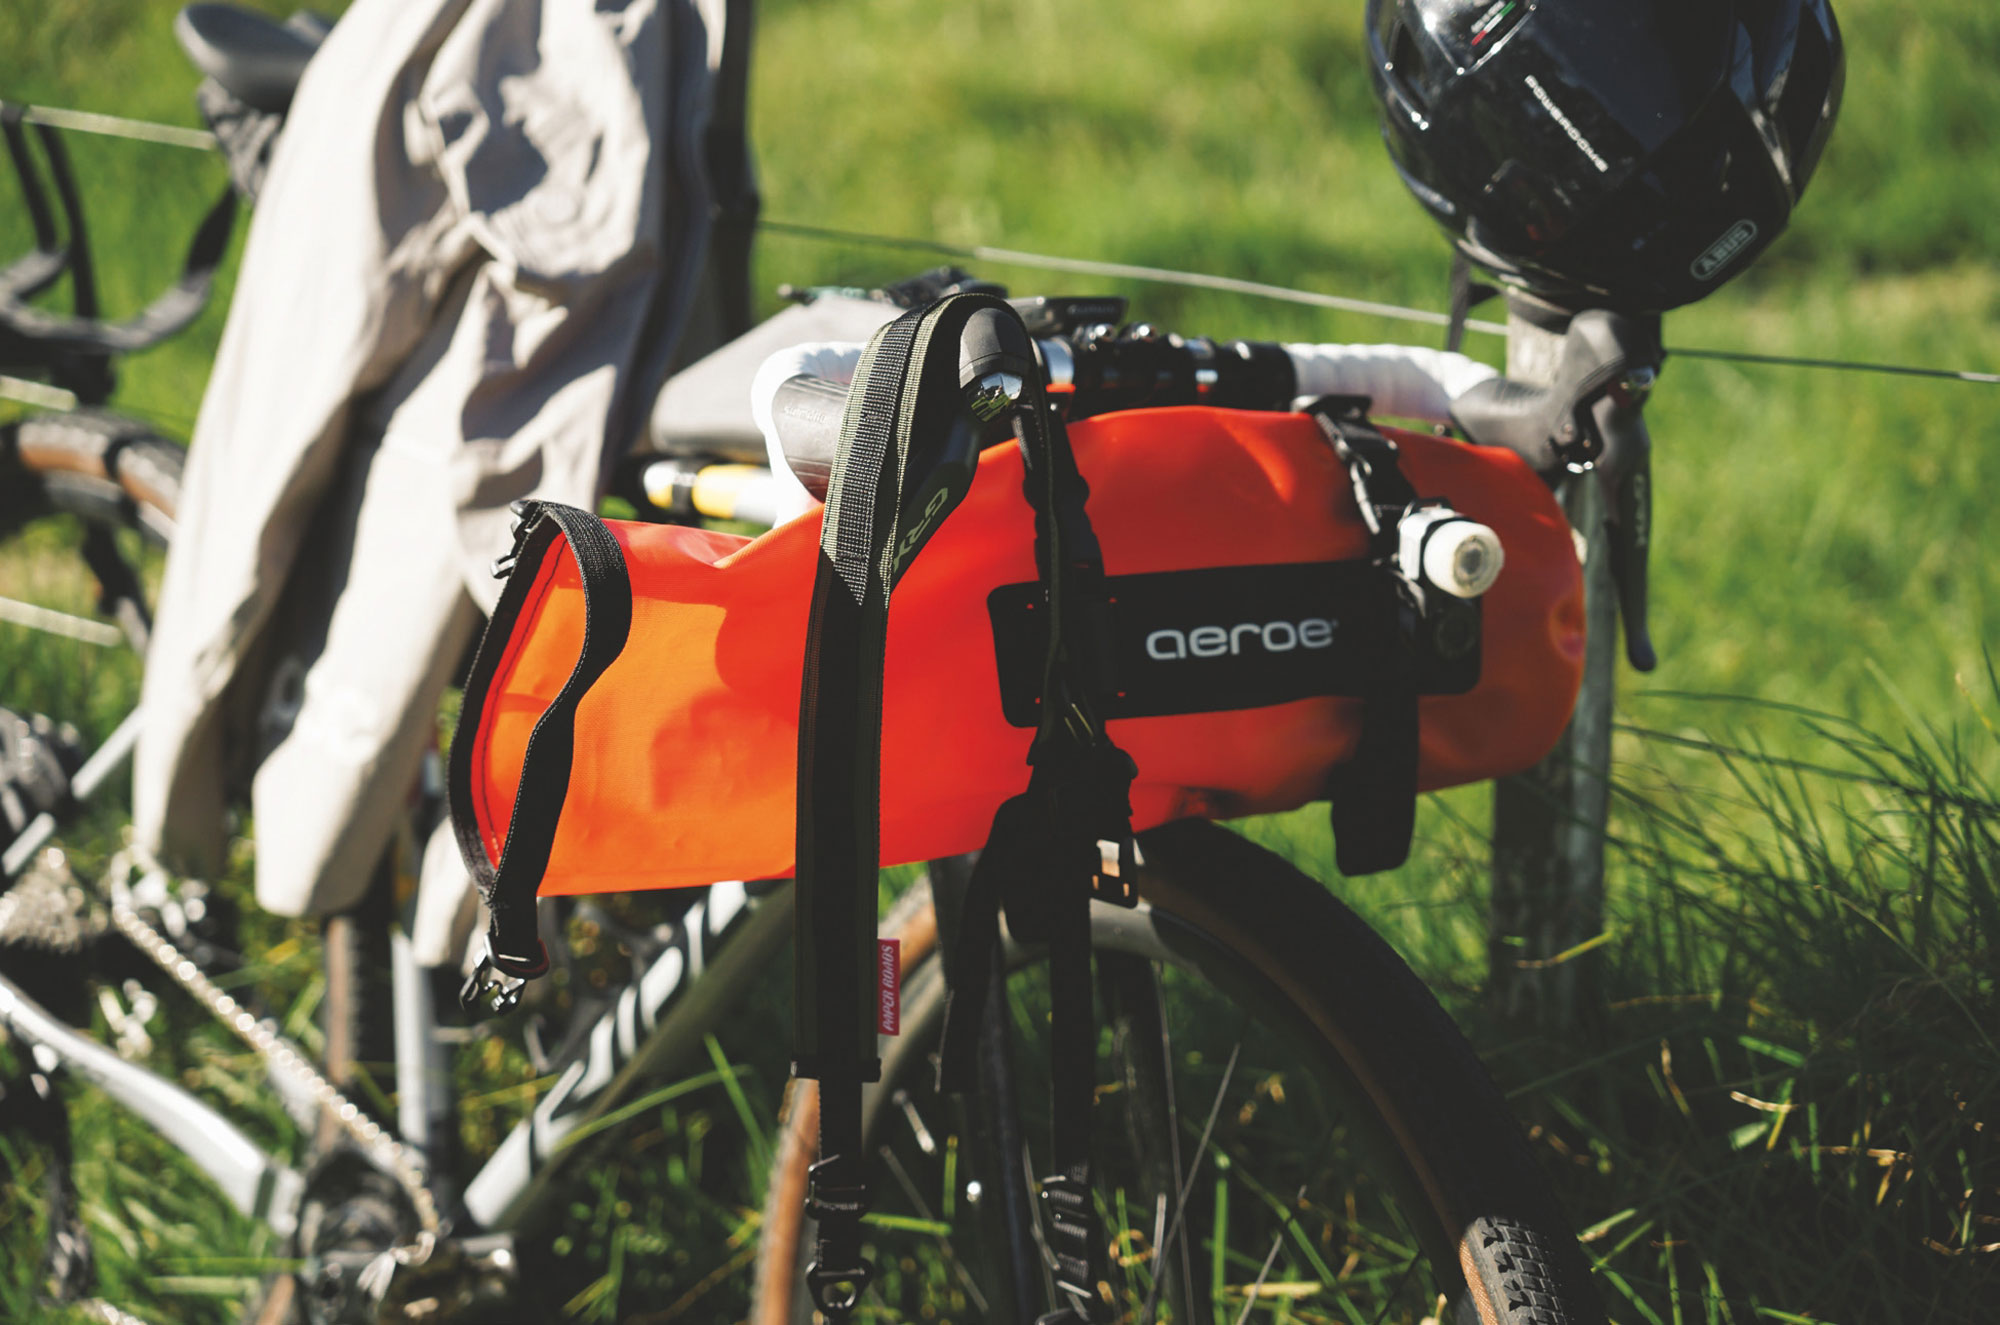
I strapped on an 8-litre Aeroe dry bag loaded with clothes, a small towel, a power bank and varying levels of food over the trip. The sturdy bags are made with small sleeves to feed the cradle straps through, keeping the whole load stable and secure. Any old bag could be used on the cradle although I doubt it would be as secure, or offer the same peace of mind, as the Aeroe bags. The beauty of using a roll-top dry bag is the ease of access – depending on how tightly packed it is and where it’s situated compared to the handlebar, there’s no need to remove the bag from the cradle, just unroll the end for easy access.
After being rattled and bumped around during a solid few days out on the trail, I got to know the ins and outs of the Spider Cradle system, warts and all. What did I learn? The system was super easy to use and a great way to carry gear; however, I discovered that it is not ideal for some cockpits. My gravel bike had a relatively narrow handlebar (for a gravel bike), so once the bag was full, it fouled with the gear shifters. Some pre-dawn roadside stops to adjust, readjust, and ultimately re-pack the bag to get everything to work adequately, added an air of urgency en route to our ferry to Aotea.
Across the days of our adventure, I had varied experiences with the cradle. For some reason, I had to tighten it many times to stop it from rotating downwards and having the dry bag contact the tyre. Interestingly, when mounting to my MTB on a previous trip on far rougher trails, I didn’t have any slippage issues, so perhaps I didn’t adequately tighten the straps down in the first place this time around.
I found the bag sat tidily on the cradle when packed full, and didn’t move at all once I’d removed some gear or eaten some of my food supply and there was a bit more space in the bag. Even with the ‘top’ rolled as tight as possible and the straps tightened, I found the bag was sagging down between the straps and catching the front tyre occasionally. Access from only one end of the dry bag means that when the bag isn’t fully loaded, the cargo must be packed into one end, making an off-centre load when mounted on the cradle. It’s not a huge issue, but it did mean I needed to be more conscious when I was packing the bag. If the bag had a roll-top on either end, the load could be nicely centred, its weight more balanced, and less sagging would happen.
It’s worth adding a caveat here that the handlebars on the bike I rode were set relatively low, almost slammed, so there was not much space between the tyre and the bag, around 30mm when the bag was tightly packed and plumped up. As you can imagine, any sag or slippage of the cradle may not be too much of an issue if I had more wiggle room on offer; it is certainly worth keeping in mind if you’re looking to mount the system to a gravel bike with a low front end, or even a road bike.
When all’s said and done, the cradle and its bright orange bag are tidy pieces of kit. However, when mounted on a drop bar bike with a reasonably traditional layout (i.e. roadie style), setting up the system can be a bit niggly, requiring some patience as you figure out the best way to not only mount it, but what and how to pack the bag. Once I had the setup and packing layout sorted, after a few false starts, the system worked well and I reckon when fitted to either a flat-bar bike, or a more touring-style cockpit, there wouldn’t be any questions about whether it was a worthwhile purchase.

Spider Rear Rack
Aeroe’s design prowess is evident in their Spider Rear Rack; this modular system allows for several configurations to carry cargo on the rear of your bike. I set the system up using the same style Spider cradle as mounted on the handlebar, and strapped on a 12-litre Aeroe dry bag. Additional cradles can be added to the sides of the rack, bringing the total possible bags up to three. Alternatively, ditch the cradles altogether in favour of Aeroe’s recently released Pannier mount and add traditional Pannier- style bags. Aeroe’s website states you can carry up to 16kg in three bags on the rear rack system.
Aeroe claims a 20mm variance in the seat stay width that the rack can attach to. It’s a bit rudimentary, but flex in the rack allows it to fit a variety of stays. Combined with its adjustable feet, I imagine you’d get the rack to fit most bikes, provided you have some patience for the installation. If you’re not mounting the Spider Rack to a MTB you’ll likely need three hands and some grunt to flex the rack arms into place, loop the straps around the stays and then tension the lot into place. It took two of us a lot of flexing of the rack – and our arms – to get the rack in place on my gravel bike. Eventually, our effort paid off and the rack was in place, although the installation process made it obvious the system is more suited to a MTB-style rear end with its wider and larger diameter stays.
The rack can be vertically adjusted thanks to the rack frame’s ability to telescope inside the clamp feet. I adjusted the rack to the optimal height with the load as close to the rear tyre as sensible to keep the load as low as possible.
My 12-litre Aeroe dry bag was stuffed with my after-ride necessities, including a sleeping bag, sleeping mat, bivvy bag, thermal top, long Johns, and a gas canister for our cooker. Throughout our Barrier trip, all remaining nooks and crannies were filled with various food and snacks.
Set up with roll-top access to the rear, access to gear was simple, and there was no need to unstrap the bag to access its contents. Unfortunately, when the bag was full and the straps fed through their housing on the bag, the weight was off-centre and too rearward. I found it more stable with the roll-top at the front, making access more difficult. Could a roll on either end of the bag solve this issue? I’d imagine so.
While on the road, the load stayed in place and was sturdy enough. A little flex in the rack did cause some sideways sway of the cargo, but nothing to detract from the ride. Off-road, however, even over smooth bumps, the load would whip somewhat and get a bit of bounce going. Initially, this was quite off-putting as the load would pull on the bike, which was certainly the downside of the weight sitting above the rear wheel. After a few kilometres, the feeling became familiar and was forgotten on all but the roughest sections of the trail. In fairness, some of the flex causing the bounce came from the bike’s seat stays, but a lot from the rack itself. The bounce wasn’t too much of a concern on the alloy frame I was aboard, but I wouldn’t be so keen to put this rack on a lightweight carbon frame – regardless of whether gravel, road, or MTB style – for fear of cracking a seat stay.
Most of my experience with the Spider Rack has been positive, and it certainly does the job it’s supposed to. Aside from the bounce mentioned above, the only other issue I struck was that over time (and rough tracks), the rack crept down the seat stays from where it’d originally been attached. The remedy was a simple case of loosening off the mounting straps, sliding the rack back to its original position and tightening again. It’s not a big deal, but some admin I’d rather have done without. After looking at the attachment foot and straps, it appears the issue here is partially due to the thin seat staying on the bike. At under 10mm in diameter, there’s simply insufficient surface area for the rack foot and tensioning straps to grip effectively. In the future, if I use the rack on small seat stays, I’d wrap a few turns of rubberised tape around them to increase the surefootedness of the setup.
Regardless off the niggles I’ve outlined above, I like the Aeroe system, and on the right bike, I think it would be a great option if you’re looking to carry more gear than is possible with a more commonly seen bike-packing style Saddle Bag. I’ll give the Spider Rear Rack a go on a mountain bike and see how the experience stacks up against the one I’ve outlined here; I’m sure it would be more suited to a MTB frame but, after some trial and error, it can be made to work effectively on a more road-style gravel bike too.


