

Words: Liam Friary
Images: Cameron Mackenzie
Welcome to the first edition of our bike build series. In this feature we will get the latest goods and/or fruitiest parts, then build up a unique frameset.
It generally takes some persuasion (and long meetings over several coffees) to get the brands involved, but in the end we get there. We’ll will aim to highlight the build process right through to the ride. Trust me: this is for you – we have to return (most) of the parts and bikes after the project! So, without further ado, here’s the first one:
We wanted to build a gravel bike that could travel anywhere; not only be ridden around local roads or chucked on your roof rack, but a bike that could be thrown under an airplane too – you know, without those pesky airline charges or having to haul a cardboard bike box around an airport. Yes, there are some good travel bike cases out there, but the airlines (especially abroad) will hit your credit card whenever they can. Last year, in America, I got charged with extra baggage fees a number of times.

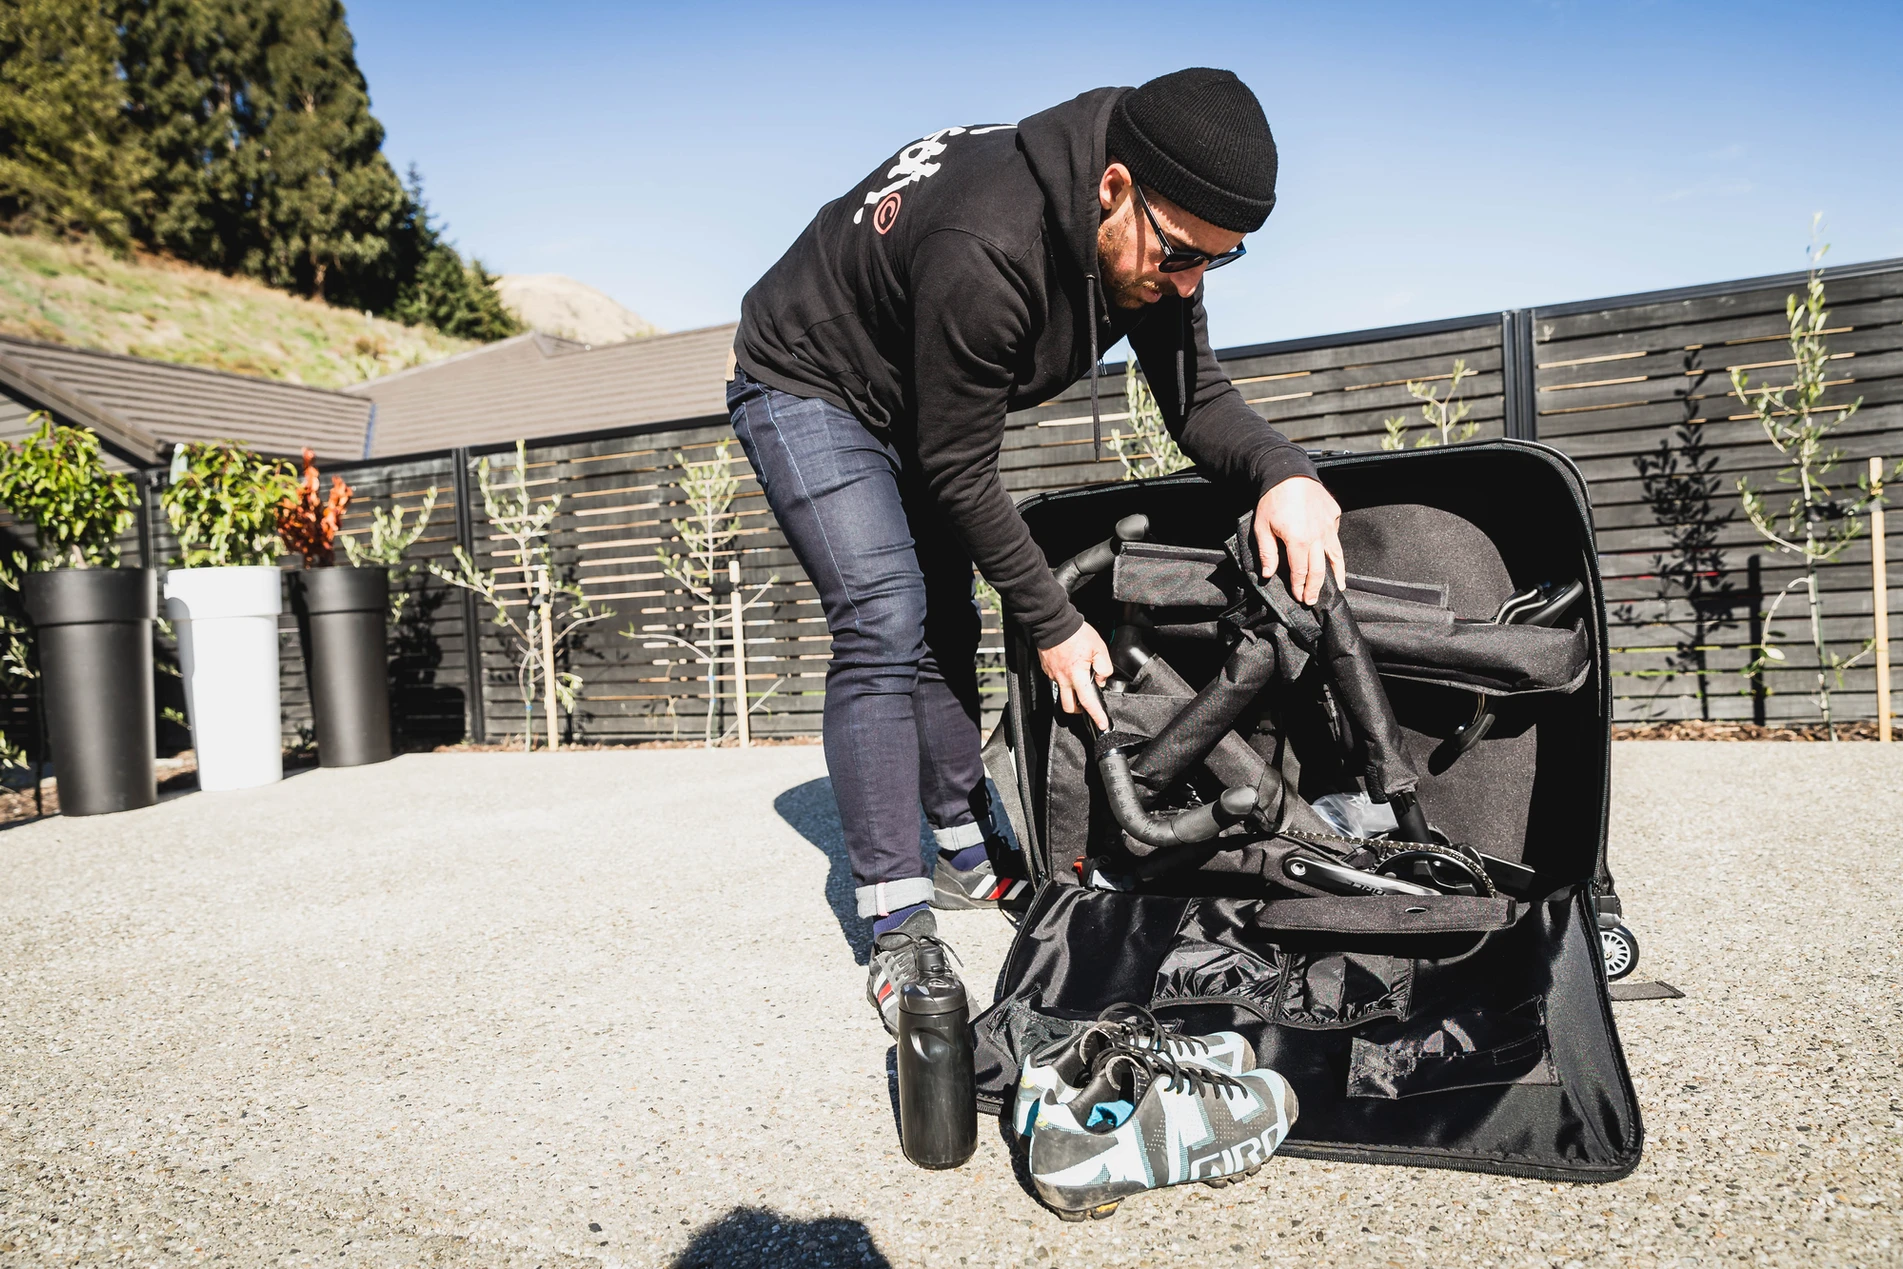
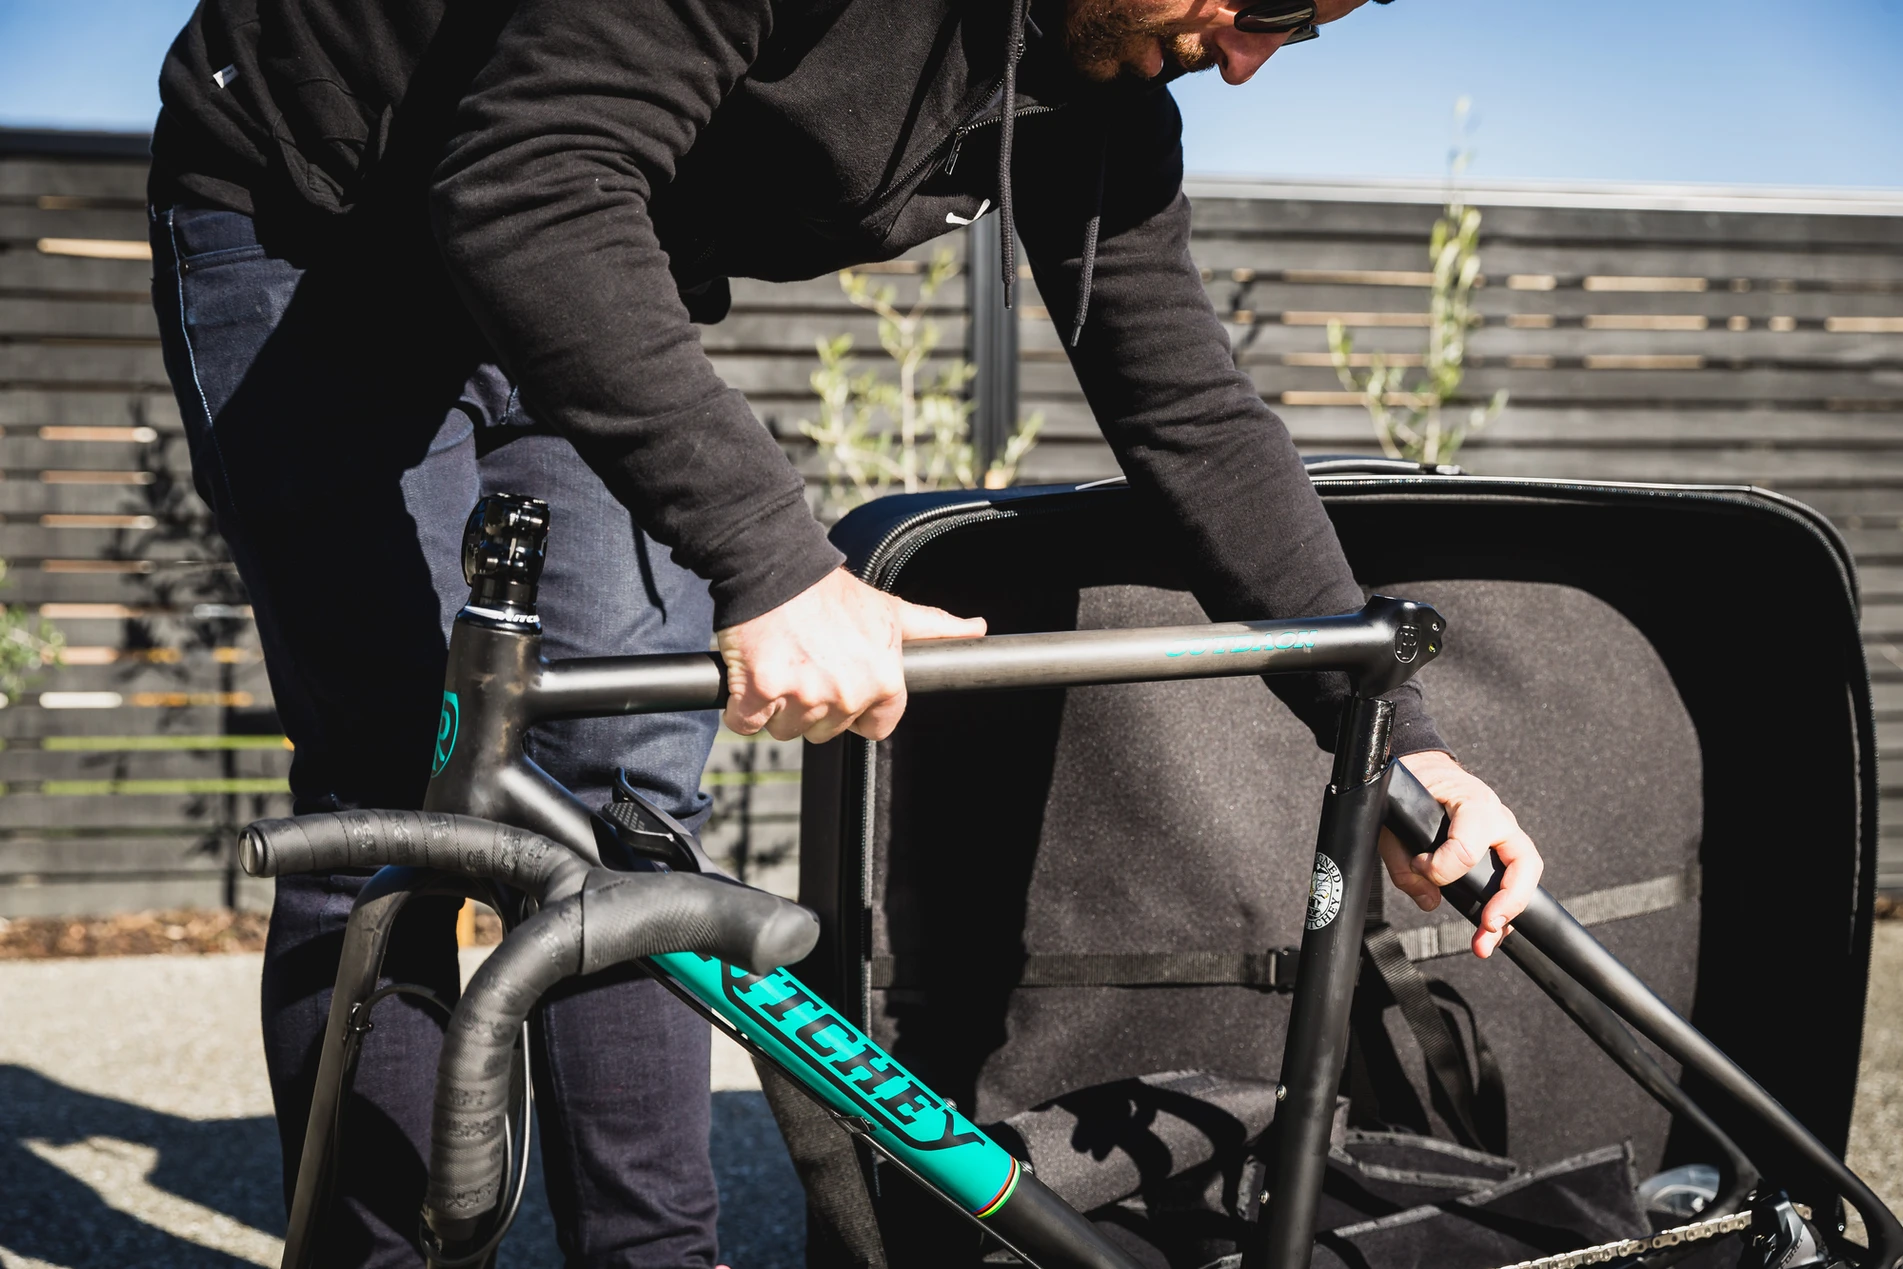
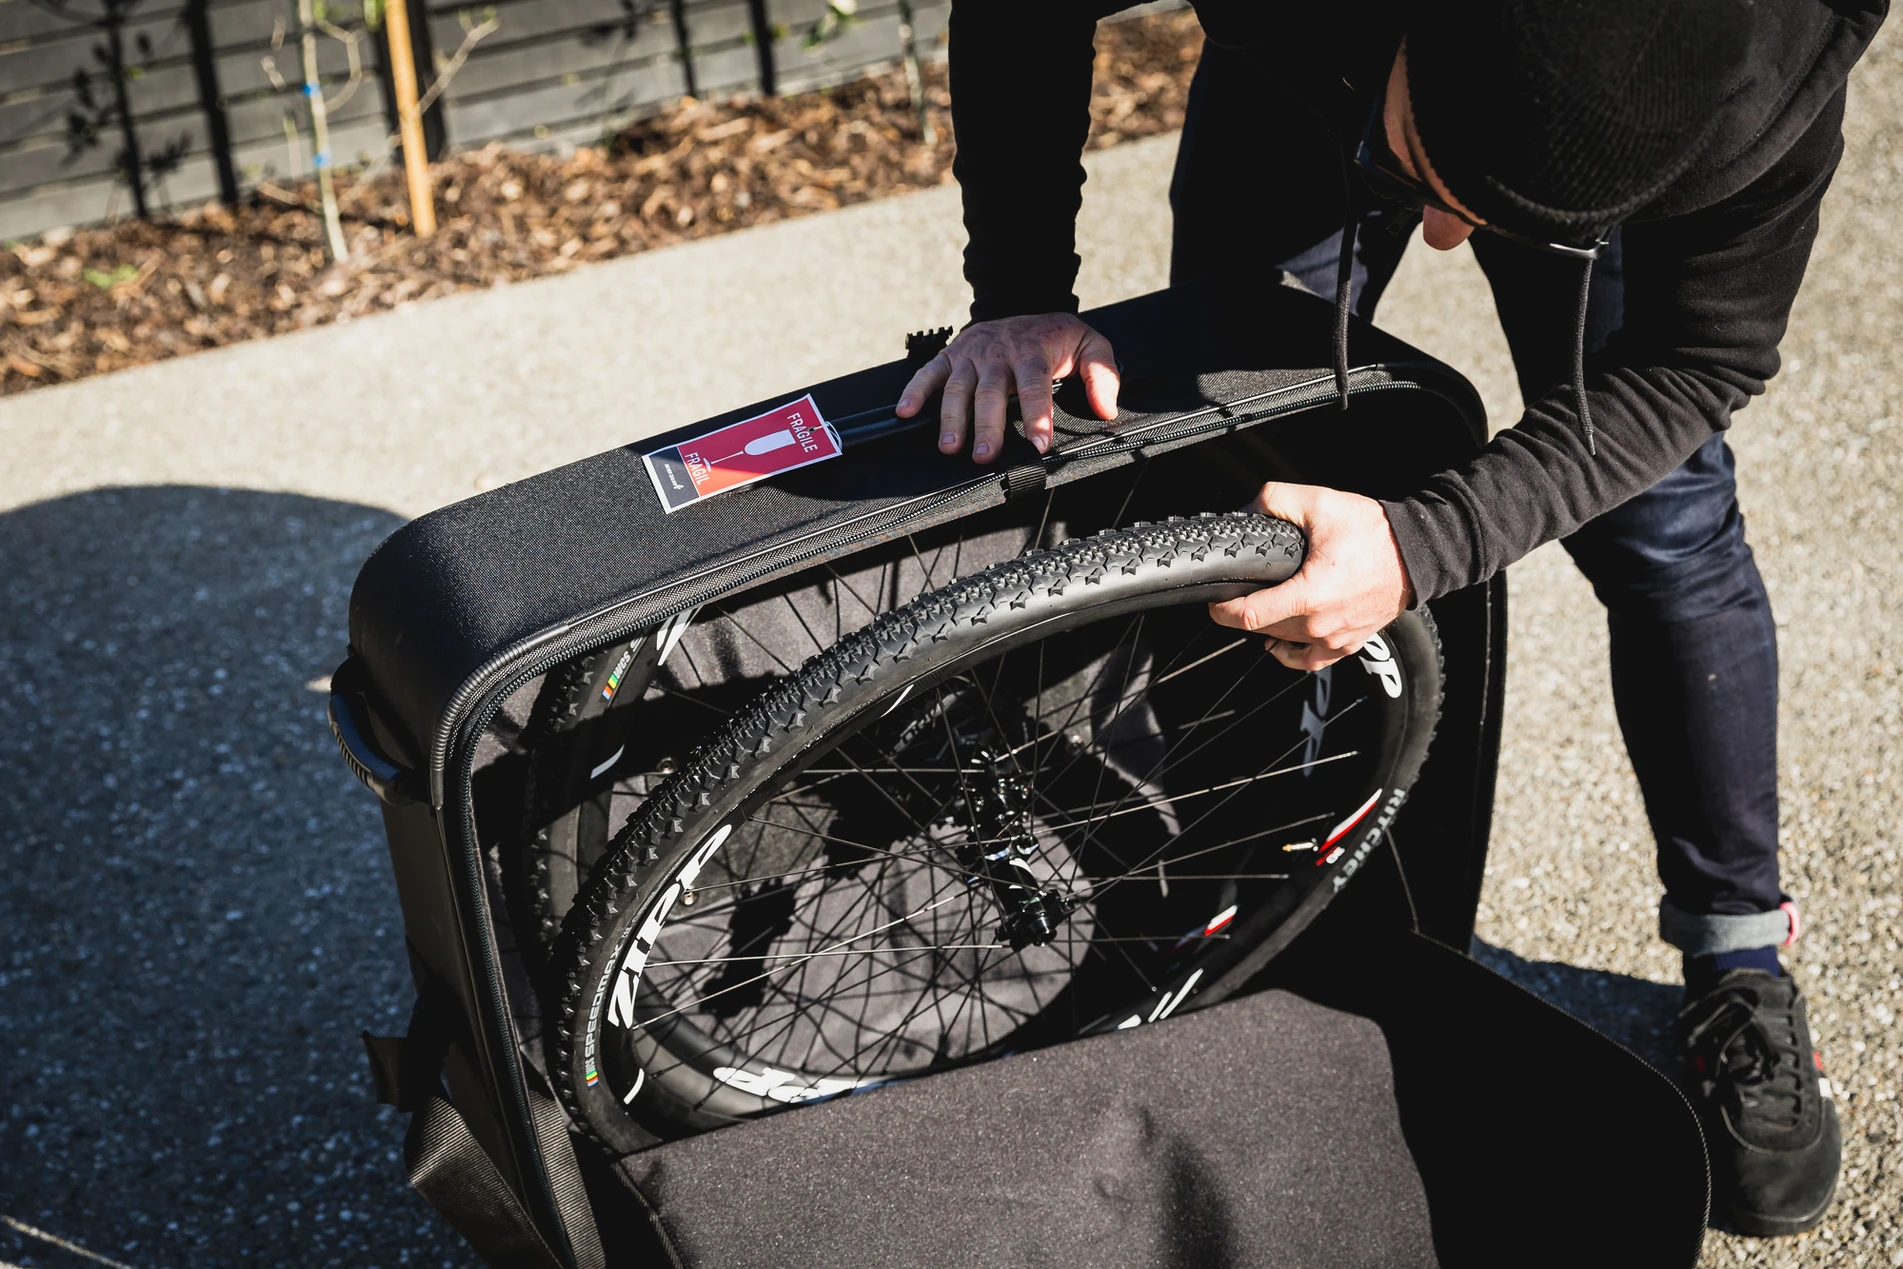
Ritchey have, for a long time, offered a range of production travel framesets with the patented Break-Away design. Break-Away frames split at the top tube and seat tube junction, and again at the bottom of the down tube, near the bottom bracket. The down tube sections have tapered male and female ends to aid in alignment, and are held together with a simple metal clamp. Up top, the built-in seatpost collar serves double-duty as it also clamps the upper seat tube stub in place inside the end of the top tube. As you can tell, these framesets were made with the traveller in mind. The bike folds down into a case that looks similar to a large piece of luggage, rather than a bike bag. As we were searching for rugged adventure, we opted to build the Carbon Outback version.
SRAM’s new eTap AXS caught our eye recently. This groupset is wireless, which makes life super simple when building a custom bike. We opted for the Force eTap AXS – not only is it a little more affordable, it’s also cheaper than SRAM’s top-end RED eTap AXS for replacement parts (which matters when riding rough). The new Force eTap AXS groupset shares the same motors as RED, as well as the faster signal transfer and a new, more powerful chipset. However, it has been stripped back in other areas, such as the crank arms: RED features SRAM’s latest Exogram technology for superlight, hollow carbon arms, while Force uses a more modest (though still light) solid carbon construction.
We chose the 1x crankset system up front to make the shifting as efficient as possible when exploring heavily rutted backroads. SRAM’s X-Range gearing is designed to minimize the teeth between jumps while shifting. Next, we moved onto the the rear cage, which is a combination of a metal back plate and LFRT (long fibre-reinforced thermoplastic). To help with the larger shifting, the clever dudes at SRAM developed a smart Orbit system, which means you don’t need a clutch for chain retention. Keeping the chain taut is a must when it comes to riding on gravel, and the new Orbit system is said to reduce chain bounce. Speaking of the chain, it’s rather unique; it has a flat-topped profile and is made of ultra-bright Hard Chrome. This flat-top chain allows a wider gear range and gives it extra strength and durability. Again, ideal for our gravel bike build! Still at the rear, Force’s 12-speed cassette uses the pin-dome technology that was developed for SRAM’s 1x mountain bike cassettes. If you want a bigger range, you can use a mountain bike cassette and/or derailleur, as SRAM have developed a new AXS eTap range for mountain bikes too. This means you can now mix between the road and mountain groupsets.
SRAM’s Force eTap AXS HRD Shift-Brake system is responsible for stopping this rig. I like the fact that this system helps riders set their preferred finger position for engaging the brakes. You’ll also get SRAM’s CenterLine XR rotors, which have rounded edges to meet UCI compliance. Not that we need UCI sign off for our adventure rides!! We do, however, need ultimate stopping power and complete control when doing these adventure rides, and this is when hydraulic brakes with 160mm rotors come into their own.
Zipp’s SL components were employed for stem, handlebar and seatpost duties. The SL lineup is comprised of Zipp’s carbon components and are geared towards the road, cross, and ever-growing gravel segment. As the bars, stem and seatpost take a lot of impact on the rougher roads, you need the components to be reliable, robust, stiff and lightweight. So, on paper, these were well suited for our gravel bike build.
Onto the wheels and rubber: we used the Zipp 30 Course disc-brake wheelset as they are tough and affordable. Being tubeless was also key when putting together the build. Tubeless tyres offer lower tyre pressure and remove the risk of pinch flats. For the rubber, we laced Ritchey Speedmax Tyres to the Zipp 30 wheels. We knew the bike would be taken out on the harshest terrain we could throw at it, so we decided to fit 40c tyres, which just snuck into the frame.
The Build (notes from our mechanic – Cameron Mackenzie)
A lot of thought went into building up the Outback Breakaway. This was the first travel-specific bike I’d put together, so things like cable routing, cable lengths and working out how the brake line could be separated, all had to have more thought applied than usual.
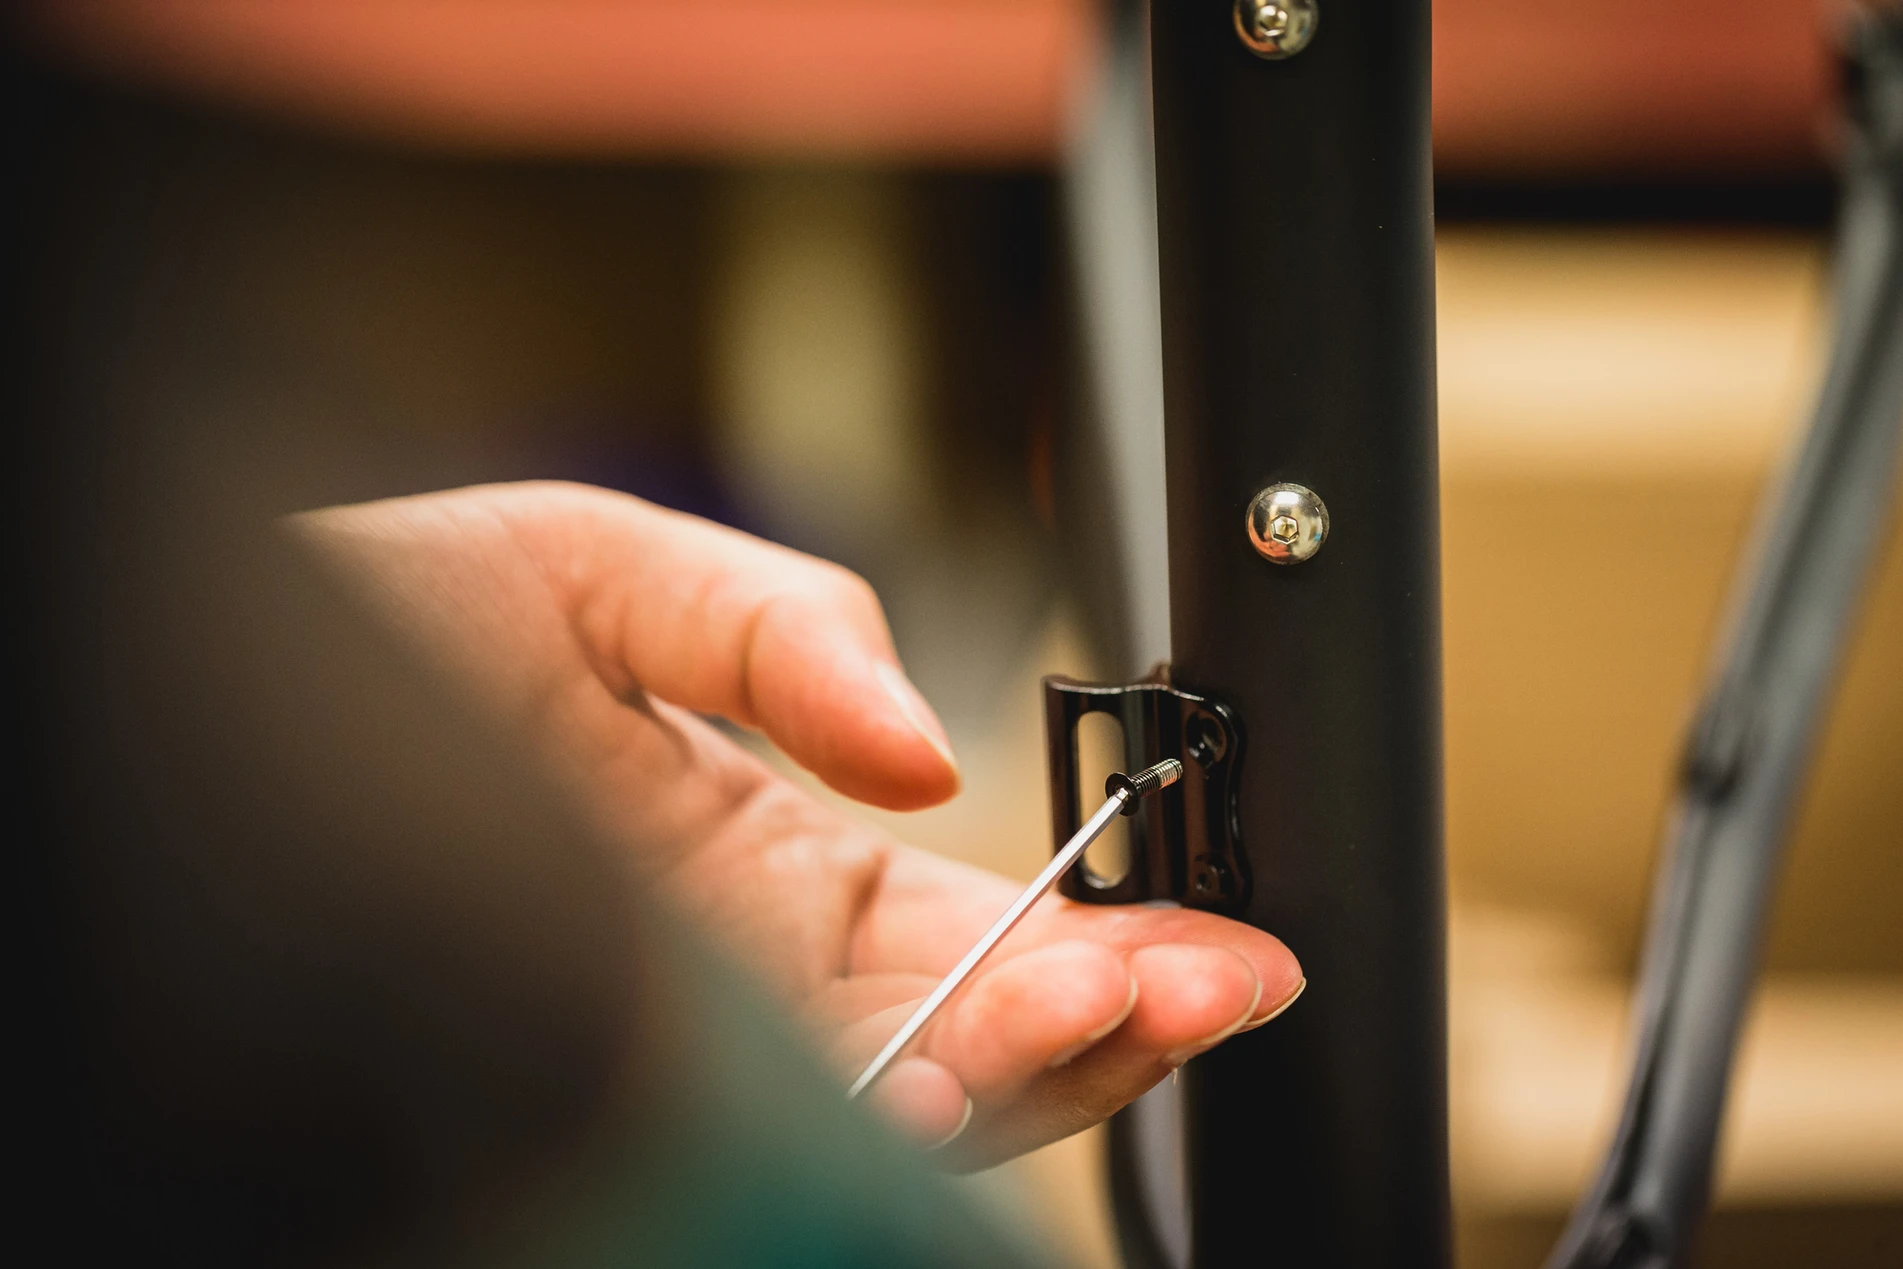
Firstly, it was apparent that the frame was built for cable accentuated disc brakes and traditional gears. The box contained clever thread-together cable splitters, and lugs and drillings that were only suitable for an inner-outer cable combo. Thankfully, the wireless derailleur and shifters made the gear changing side of the equation a non-issue. As for the brakes, it was a case of making do with what we had. I don’t think any of us had given much thought to the fact that hydro brakes weren’t suitable for this frame, due to the breakaway functionality.
SRAM’s connectamajig was the solution for splitting the brake line for travelling. The de-coupler style device needed to be positioned perfectly, as we didn’t want to have excess brake hose built into the system. Thankfully, we were able to switch the line around so it fitted flush to the lower frame clamp, rather than sitting up under the stem. We also had to drill the lugs under the frame so we could run the hose through them, rather than having to use additional clamps.
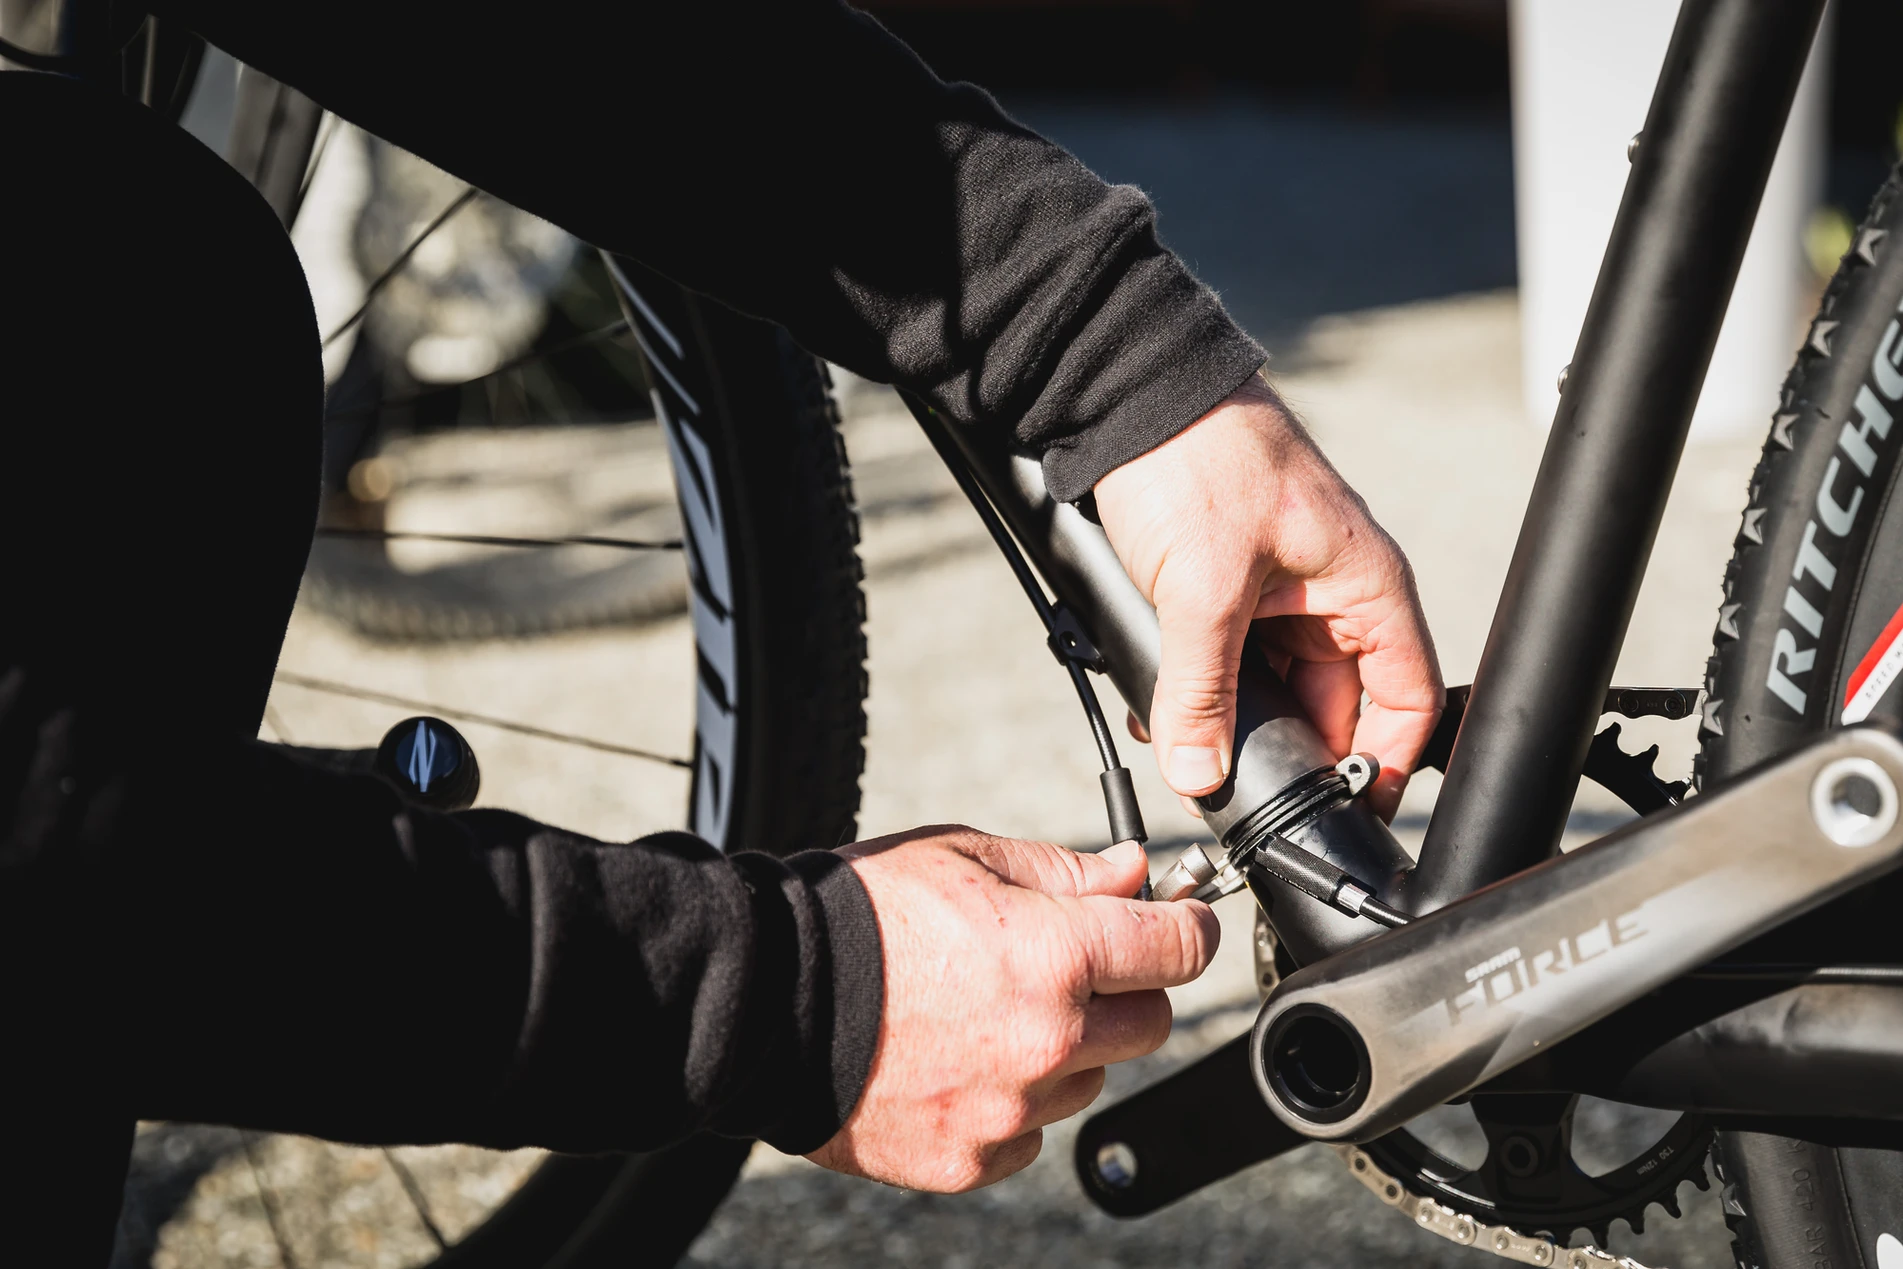
Aside from those thought provoking things, the rest of the build was perfectly straight forward. Zipp’s contact points went together seamlessly, (aside from the annoying T25 bolts). SRAM’s new 12-speed components and DUB bottom bracket system went together perfectly but the rolling changes, with ‘standards’ and new tool fittings, made life a little challenging when it came to cutting the flat-top 12-speed force chain and tightening up the DUB bottom bracket cups.
As a first time AXS user, syncing the derailleur with the shifters seemed illogical, and no amount of YouTube or Googling seemed to help. It was a mixture of pushing all the buttons and shifter paddles that made it jump to life. Thereafter, it worked well and was simple to tune, much like any other analogue system.
As a whole, the build came together really well and super cleanly. The AXS wireless shifting, paired with the small, clever parts to help with the brake hose, turned an old-fashioned, specialist frameset into something rather sleek. There are a lot of learnings to take away from what we put together here, that could help with other tricky builds or modernising other stuck-in-past frames that don’t cater for electronic shifting or hydraulic brakes.
The Ride
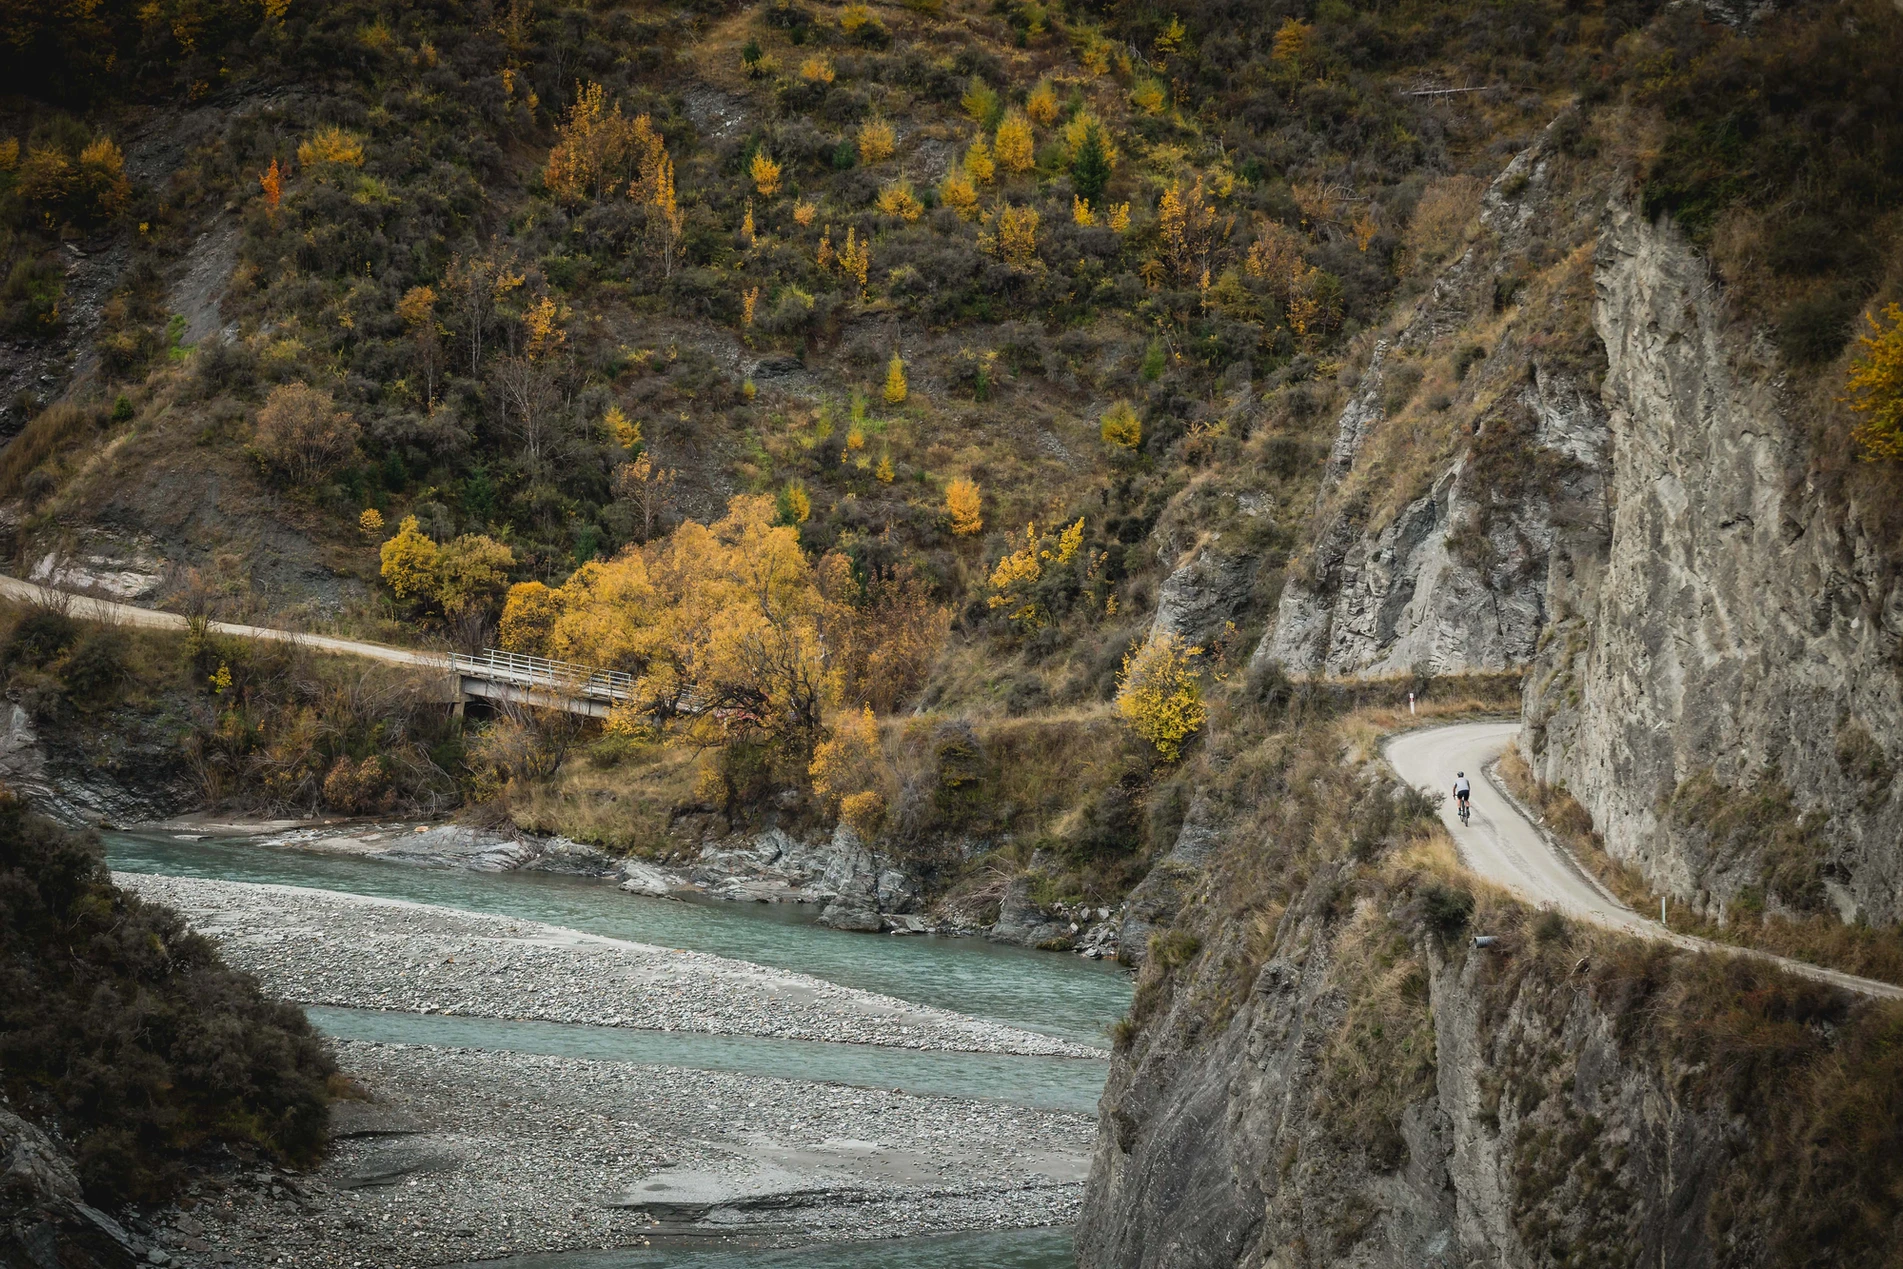
Not long after the bike was built, we were asked to head down to Queenstown for another assignment. We had a day spare, and I always like to make the most of every opportunity, so we bundled the Ritchey Outback Carbon Break-Away into its travel case and headed for the domestic terminal at Auckland Airport. There were no check-in issues with the Air NZ staff, so we hopped onto the plane and had a Cookie Time and a coffee. The early morning flight meant we’d be on the ground in Queenstown around 9:30am.
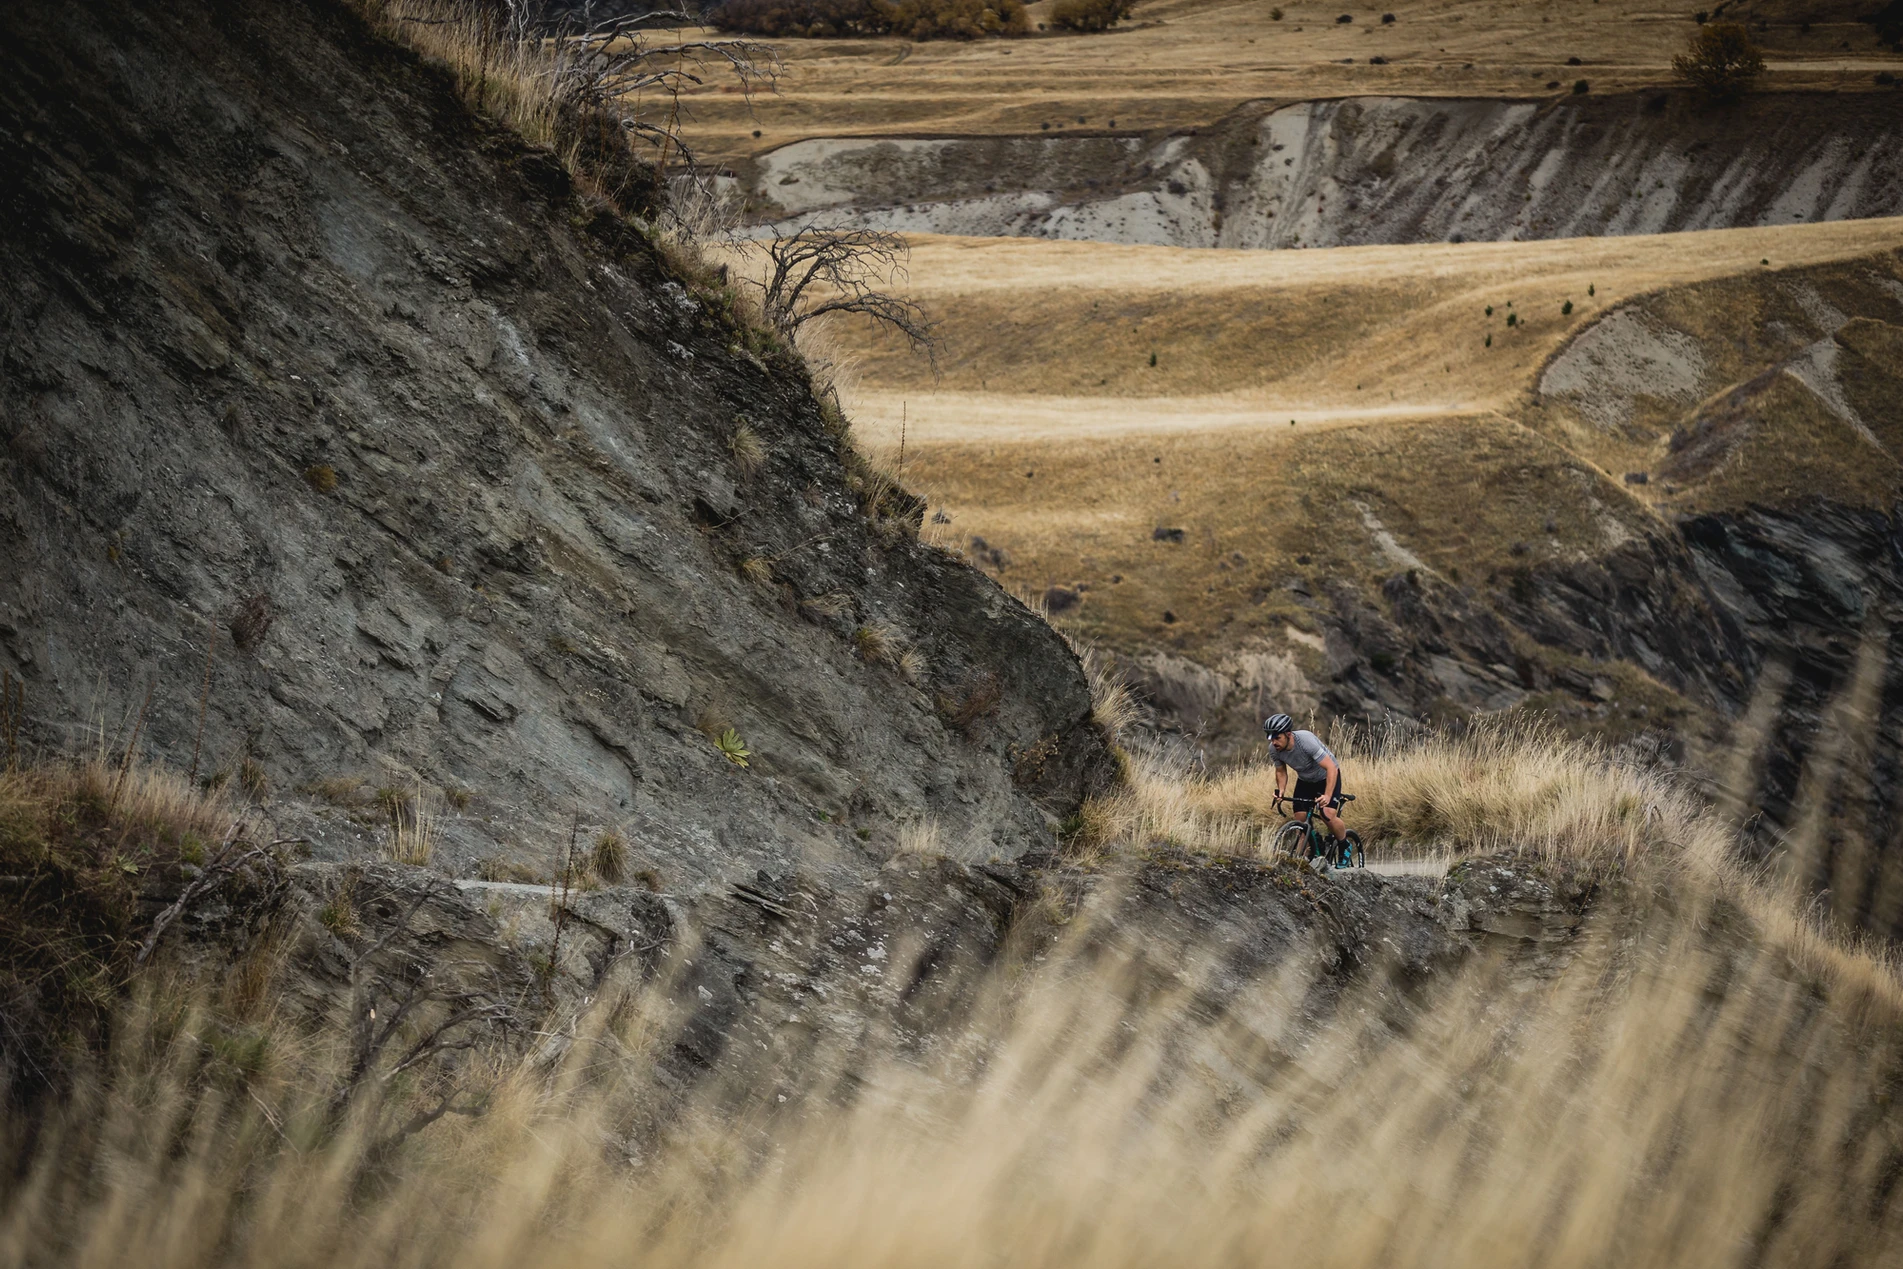
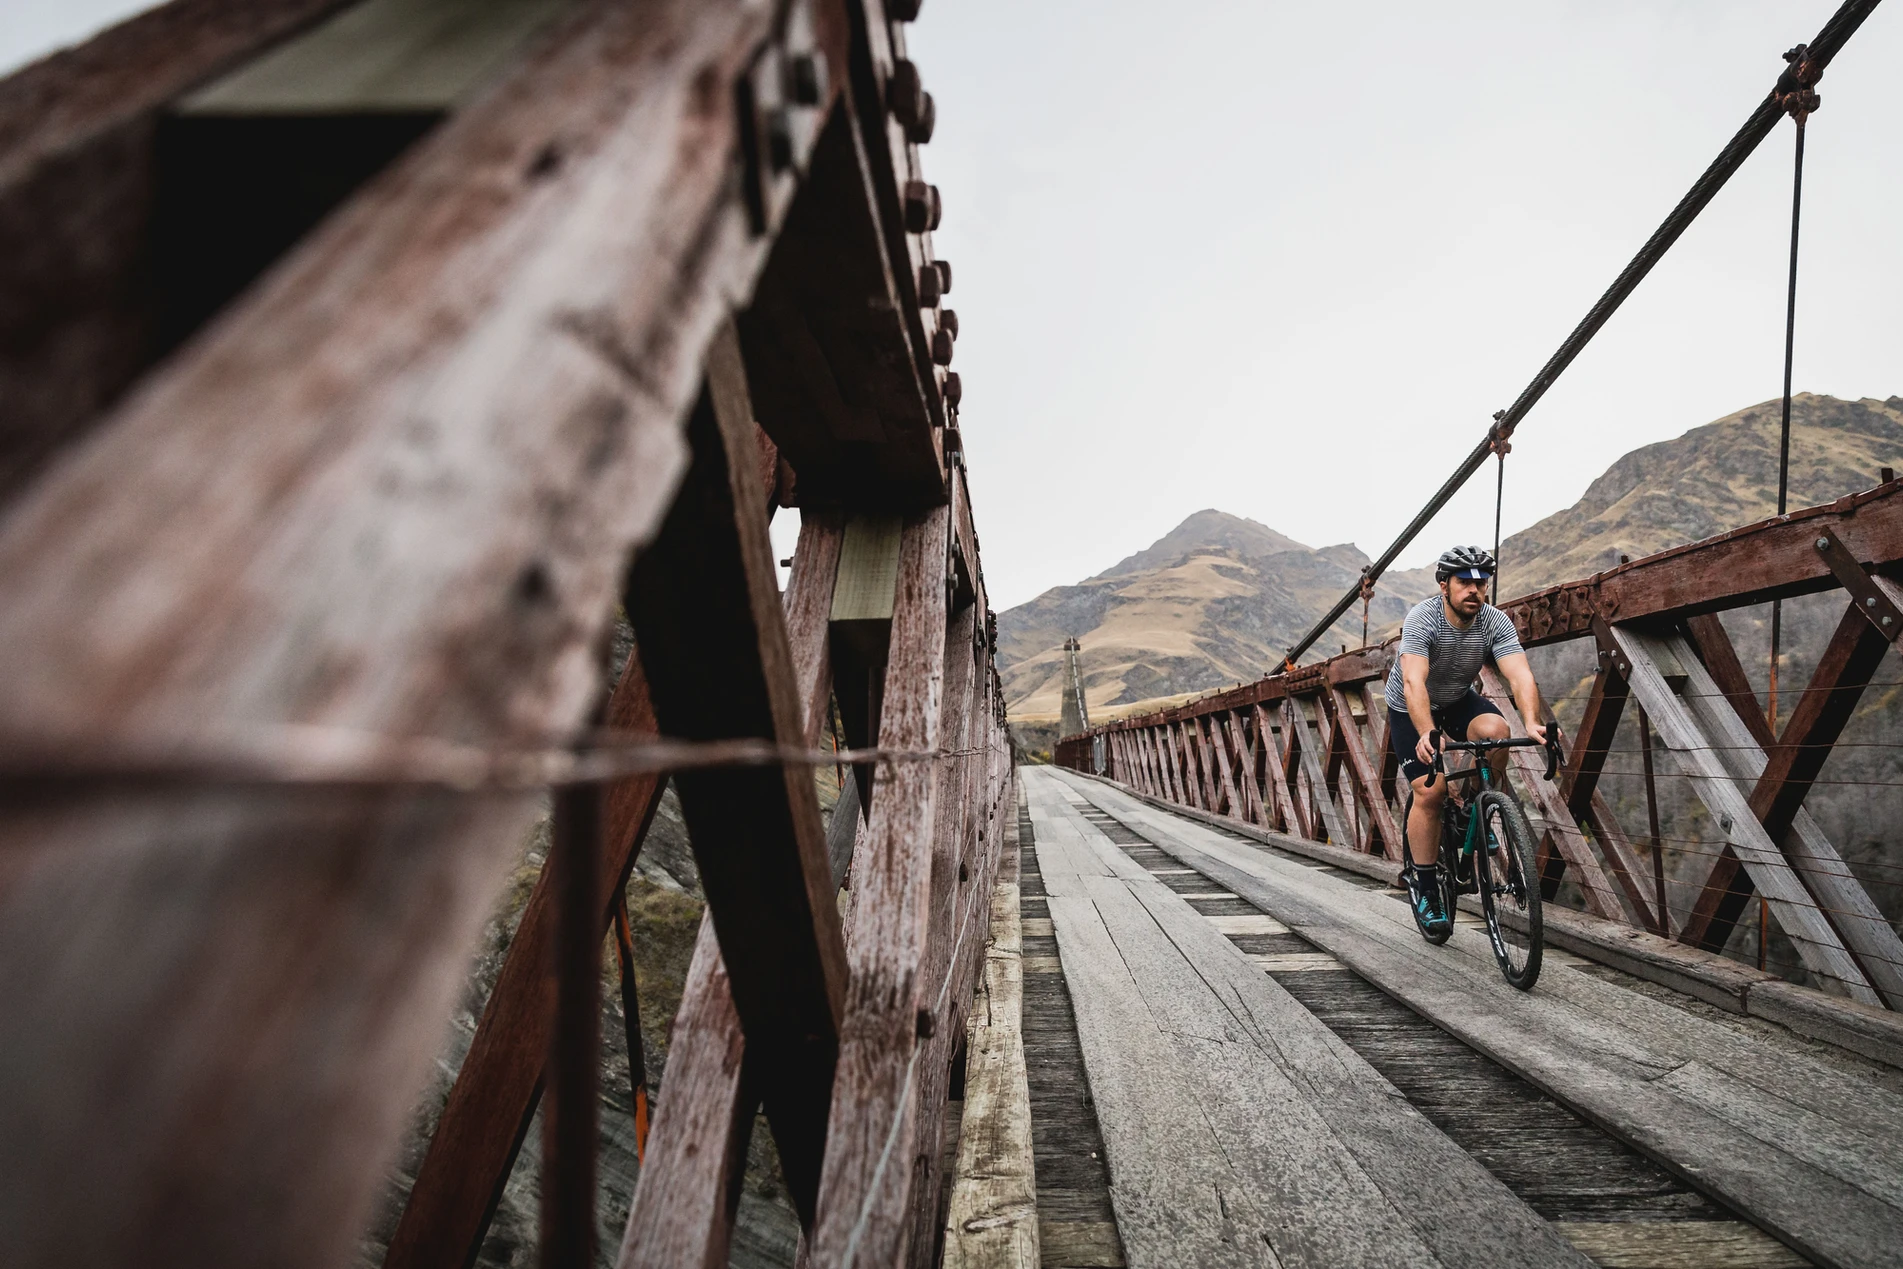
A quick wink, and before we knew it we were descending into the Southern Alps. Not keen to waste much time we hustled to get the bike built. This took around 45 minutes, but I would assume that after a few goes you’d get quicker at it. After a quick driveway test, we headed for our ride location: Skippers Canyon. This was once a busy gold mining area and at the beginning of the gold rush, no track or road was present in the canyon. As the gold miners gradually travelled through the canyon with their horses, tracks were formed. In order to make the access to Skippers safer – and to be able to bring in heavy machinery for the gold miners – the demand for a proper road grew. Skippers Road was built by four contractors who completed the work in stages over a period of seven years! And as we found, many sections of the road today remain very much as they were in 1890.
Clipping into my pedals and looking down the canyon, I was in awe of the epic scenery that surrounded me. Out-the-gate, the Outback Break-Away felt impressively smooth. As the road opened up and the vistas became more impressive, the bike really came into its own. The supple ride quality, combined with the 40c tyres under me, felt plush and the bike felt well planted. In fact, the bike felt more like a swift cyclocross rig than a slow touring bike, and I liked the fast responsiveness. The roadies would like a frame like this and it responds similarly to a road bike.
When the road stopped descending, it levelled alongside Shotover River, however, a few small pinches made me work up a sweat. Standing on the pedals, the frame felt strong and didn’t flex. Don’t be fooled – it’s no sprinters bike, but it performs well for the task of gravel riding. The efficiency of the frame was good and the overall ride quality was similar to my steel frame gravel bike (but lighter) rather than a carbon race rig. This is what Tom Ritchey intended, as he wanted to keep the ride character similar to the steel Outback. Despite the fact that the frame separates into two pieces, it didn’t make a squeak or creak, even when seated and putting some power into the pedals. However, I did notice there was some toe overlap, especially with the bigger tyres, which would make things a little tough on super technical terrain.
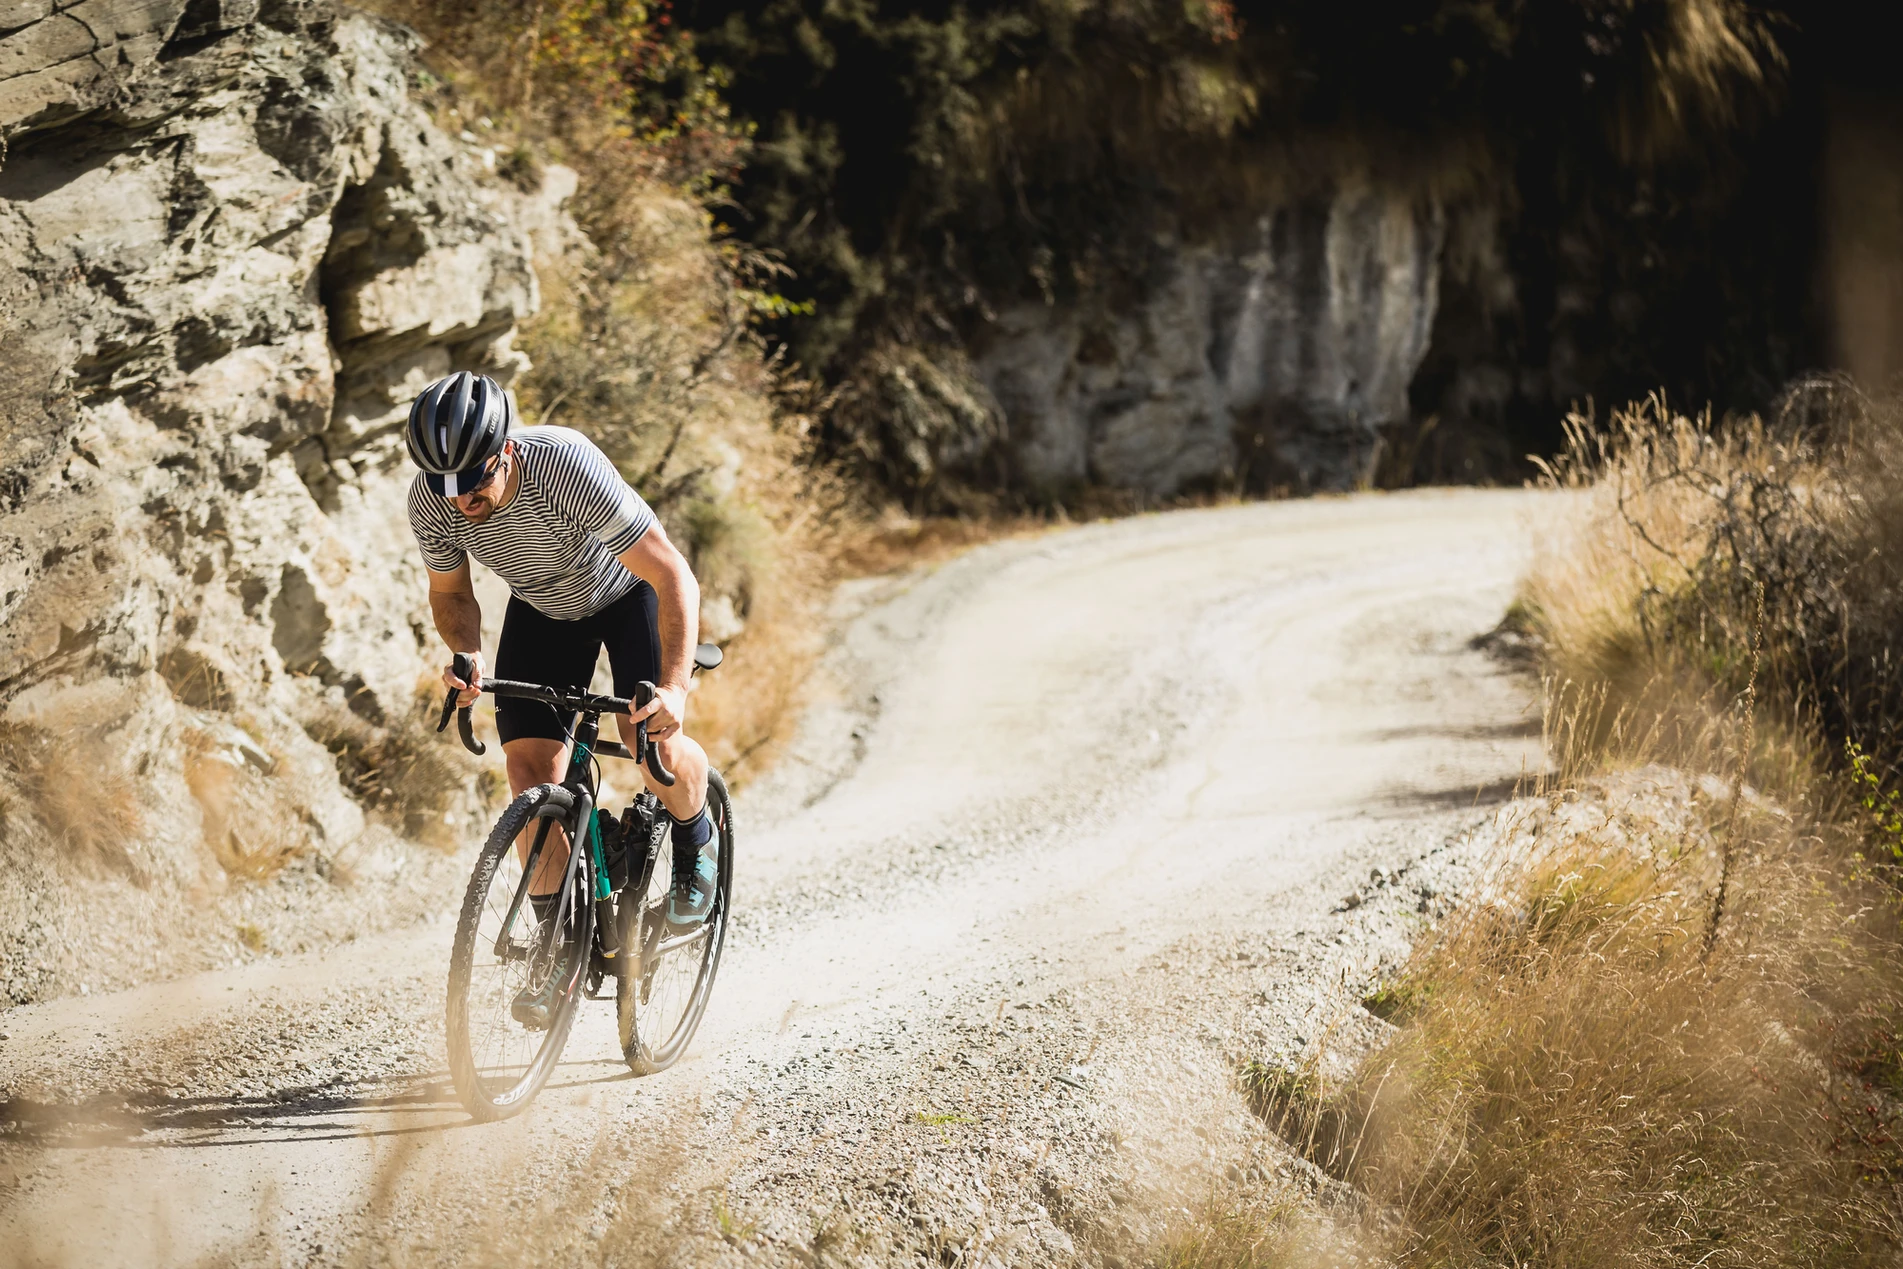
The SRAM Force eTap AXS with HRD was put to work on one of the most rugged back roads in the country. This was a tough ask, as it was the first outing for the groupset. The first thing I noticed was the the new brakes; in terms of their smoothness, sound, and even modulation – I was on a solid descent, plummeting down to Skippers Bridge after all. The power of the brakes comes on very consistently as you squeeze the lever. I liked that you could make small brake adjustments, such as giving it a little squeeze, and you weren’t left with a ton of braking power and, ultimately, over the hoods. However, if you needed to pull up, a large amount of power was available too. And, no brake noise whatsoever! We will need to test them for longer to see if this lasts…
Onto the shifting of the wireless electronic groupset. The paddle shifters were a little hard to get used to at the start, but that was more a case of me not instinctively having it down, rather than a fault. After the first hour of riding I got used to it, then it was second nature. I had the shifters set up with the left shifting up the rear cassette and the right shifting down the rear cassette. This was super nice and it felt intuitive – it worked really well with the 1x setup – however, with the app you can change around it around to whatever you prefer. As the road is used by 4WDs and tourist buses, it’s somewhat broken up and there’s plenty of corrugation. The groupset on this terrain was impressive, especially in regard to the rear mech, with no chatter or bounce on the rather rough sections. With the 1x system, the chain retention was solid and made it easy to punch the uphill parts of the road, with the chain always taut and engaged.
We’ve had this rig for around a month now, since the trip down south. The memories and photos make me want to return – but for now, work calls! All of the ongoing rides have been shorter, a mixture of road, gravel and the odd track. The bike’s prompt handling is what really astounds me for a travel bike. I like the twitchy feel and even on the road it moves swiftly – well, only if my legs are playing the game.
The shifting has been on-point, and it’s not even been touched by a mechanic – even after the travel up and down the country. For rough terrain riding you can’t really go past the 1x set up, it just offers better chain retention; and, for adventure riding one less part to worry about is a big plus. The hoods and intuitive feeling of the group just feels right – and you can’t beat the aesthetic of having no wires.